Configure your Bill Import settings
Last updated May 26 2026
You can configure how the system handles batches when they contain error bills.
Regardless of the method you choose, a good practice is to test the import using a small number of bill records from the import file and opening a new batch for your test.
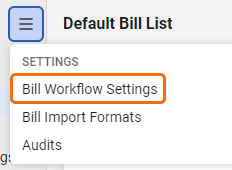
To edit your Bill Import setting go to Bills module menu and select Bill Workflow Settings
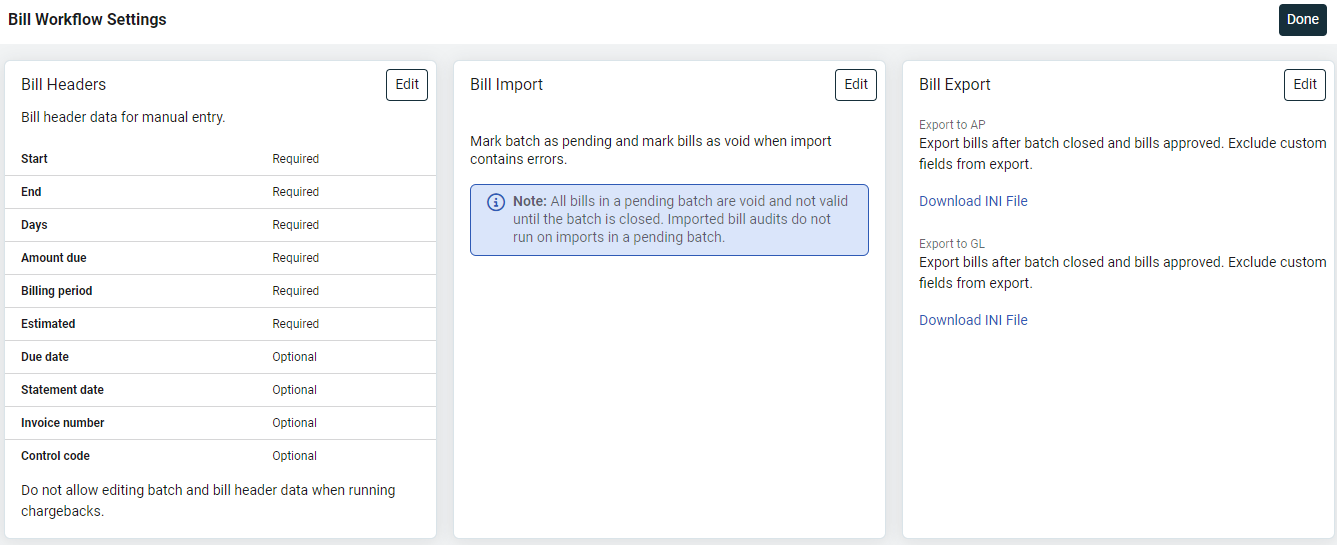
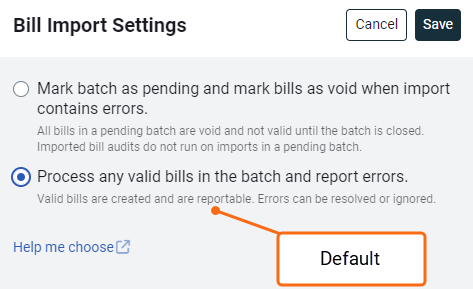
Two options for Bill Import Settings
- Mark batch as pending and mark bills as void when import contains errors.
Use this option when it is important to keep all your bills in one batch, possibly for payment purposes. - Process any valid bills in the batch and report errors. (default)
Bills are created and the batch is closed.
Any errors (bills) you correct and upload will be in a different batch.
When you subscribe to Bill Capture this is configured during your implementation and the Edit button is not available.
Default bill import settings
The default setting when you import bills is to process valid bills. Any bills that result in errors are put into an error (kickout) file for you to review. The bill import batch is closed after the file is imported.
You can download the error file, fix the problems, and import the corrected error file to create the remaining bills.
Split account charges
You can set rules to automatically distribute an account's meters during bill import. Rules are created at the vendor level and can be overridden at the account level.
Steps to import bills
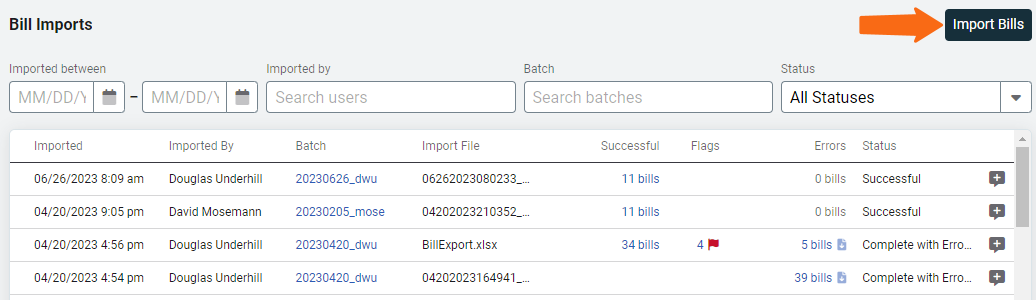
- In the Bills module, in the Bill Imports section, click Import Bills.
- Select the file from your computer to upload.
- Under Import Format choose the format you created for this file.
- Decide if you want the bills added to the open batch, a pending batch, or a new batch. If you are using the default option for importing bills, consider opening a new batch. This makes it easier to manage the bills and undo a mistake by deleting the batch and with it all the bills.
*When you select Open New Batch you will need to complete the Open Batch dialog.
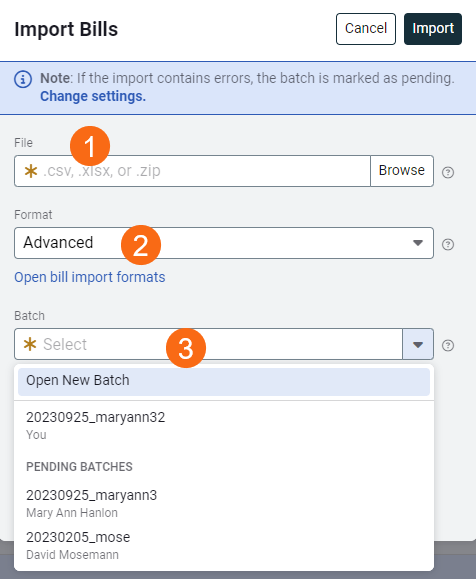
- Add a comment, for the batch if needed.
- Import.
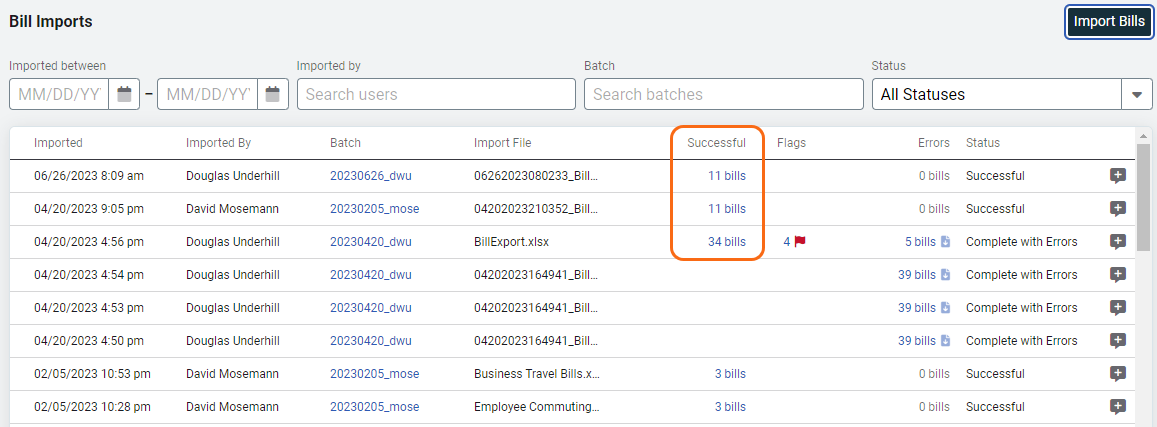
- Review the log and check for errors and flags.
- Review the Successful column to see created bills.
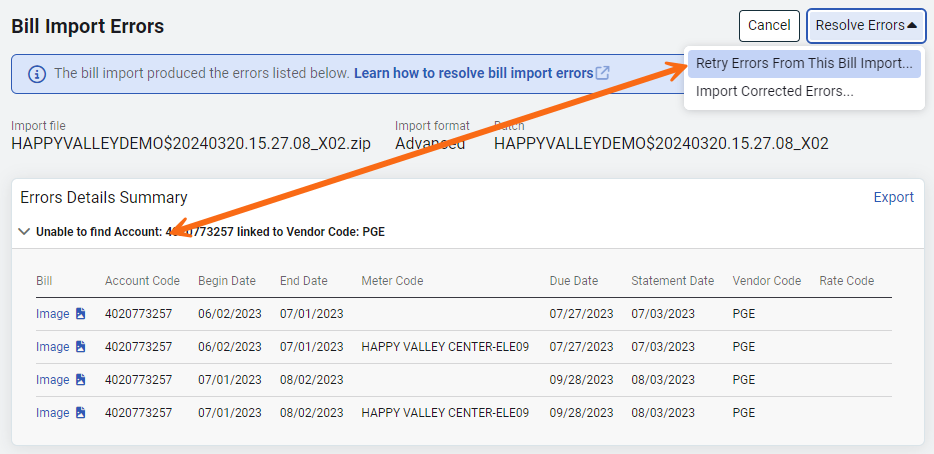
Resolve bill import errors
Regardless of the import method (import format, advanced bill import, or Bill Capture), bill resolution follows the same steps.
- Review the Errors column to see if any bills were not imported. Click on the error bills link. When the batch is not closed you have two paths to follow to resolve your error.
- Add the missing data to your database and Retry Errors From This Bill Import or
- Export, update, and import the corrected errors.
Most often when you import bills and have an error it's due to something missing in your database, usually a meter and/or an account.
Review the type of error and if it requires you to add or update information in your database, after you complete that task you can use the option Retry Errors From This Bill Import.
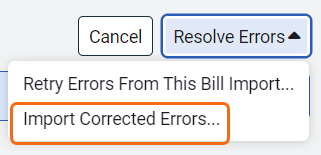
If you review the errors and they aren't due to missing information, the second option is to Export the error file, make corrections and Import Corrected Errors.
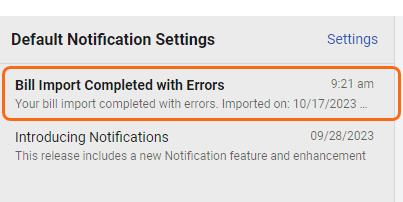
- After your bill import is finished a notification is sent with the results.
Fix bill import errors in a closed batch
If the batch is closed and the Resolve Errors option is not available.
- Download the error (kickout) file.
- Fix the errors in the file.
- Remove the two columns at the end of the file with the headers KICKOUTID and *KICKOUTMESSAGE.
- Follow the same steps as uploading the original bill import file. A best practice would be to keep it as a separate batch.