Utility Platform overview
The Utility Company Platform provides building owners the tools to view and report on their building's energy use data to comply with local and state regulations.
There are specific rules for the state where your building is located. Please see your corresponding state help article for the specific requirements.
Supported use cases
- You own the accounts and meters for your building.
- It's easy to see all the bills and data for your meters and accounts.
- New meters are automatically added.
- You have tenants in your building.
- Load the meters and view aggregated data.
- Request data access if there is not sufficient data to aggregate.
- Tenants can fill out consent forms and data is automatically loaded.
- Third party data manager.
- Are you using a third party to manage your utility bills? After they provide the requested verification information, they can see data and manually add meters and accounts.
Manage and access your account in EnergyCAP Home
Login to EnergyCAP Home
Use the URL login.energycap.com and enter your email address and password.
After you log in, you can go directly to UtilityManagement or use the EnergyCAP Home link at the bottom to add and remove users to your account.
Invite users and manage access
In EnergyCAP Home, administrators can invite and manage users, edit organization details, and change access control settings.
If you are the first user in your organization, you are automatically set as an administrator. You can invite other administrators who can also invite others to your organization.
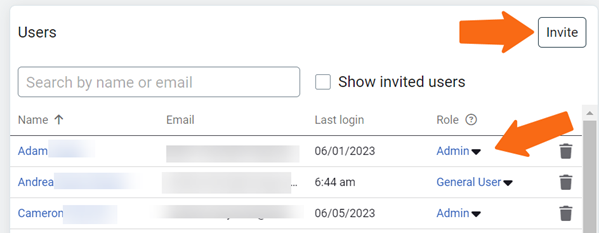
- A General User can't invite others and can only log in and access the Utility Company Platform..
- An Admin can invite and manage users and modify other organization settings.
View and analyze your data
Create sites and group them with organizations
In Utility Company Platform, organizations help you group your sites together. They let you view subtotaled use, cost, and trends.
You can create sites and organizations with the Actions menu.
Create organizations
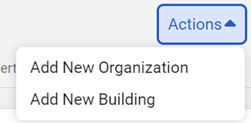
- Click your top organization or any organization in your tree.
- Click Actions.
- Choose Add New Organization.
- The parent drop-down helps you nest your organizations. When creating your first organization the only option you have is the top organization.
- Enter the name for the new organization.
- The code automatically populates, you can change this if you want.
- Use the description field to add more details about the organization.
- Save.
Create sites
- Click the organization where you want the site.
- Click Actions.
- Choose Add New Site.
- Complete the Add New Site dialog.
- Save.
Import your data
After your sites are created, you can import data by first adding meters from the Sites's Properties tab.
Add meters
It's helpful to have your latest utility bill on hand to complete the required forms.
- For customers that own the accounts for their building's meters, you can add them by using the Account Number option.
- A third-party data manager can add a meter by account number and assign the meter to a building.
- Landlords add meters by address or meter number
- If there is less than the required tenants you must follow the data release process.
- If there is more than the required units you can aggregate meters or get an individual release for each meter.
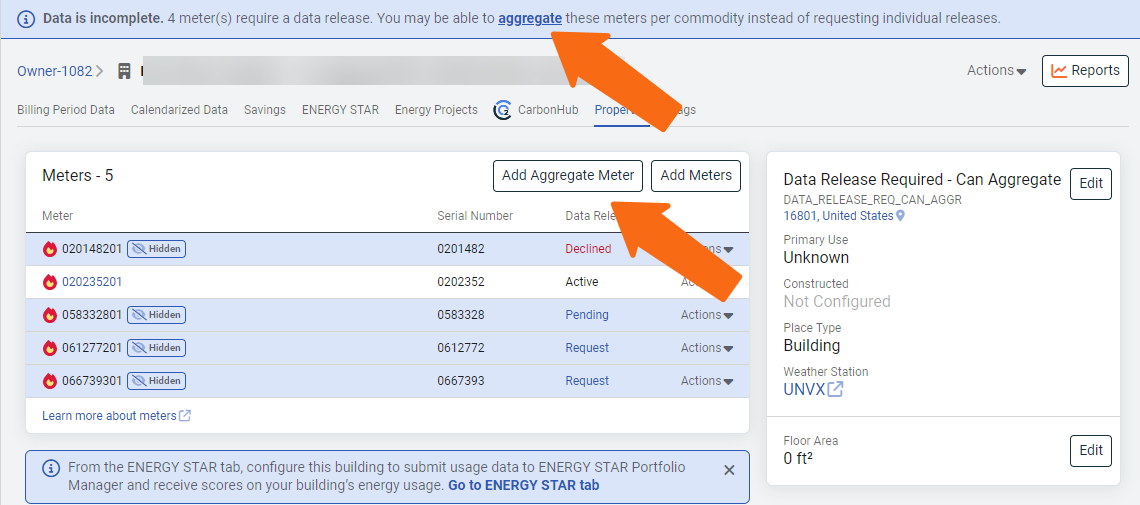
Aggregate data from tenant meters
If you have tenants, you cannot access the meter data unless it can be aggregated or you request data access. If the meters meet the requirements for aggregation, a banner explains your options to aggregate.

- Click Add Aggregate Meter.
- Select the commodity.
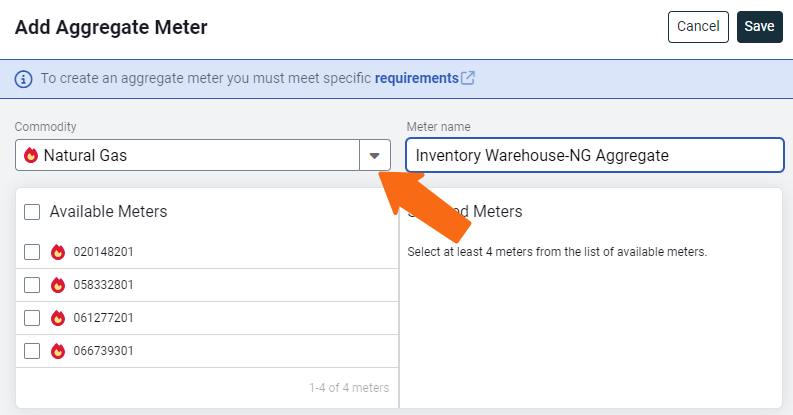
- Select the meters to use in the aggregate.
- Optionally customize the name of the aggregate meter.
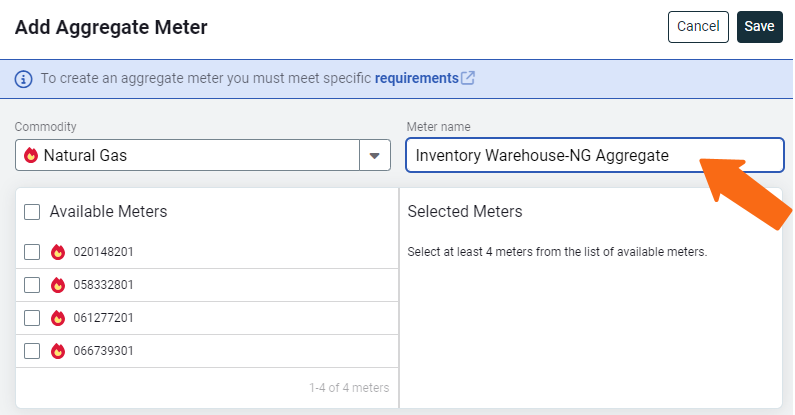
- Save.
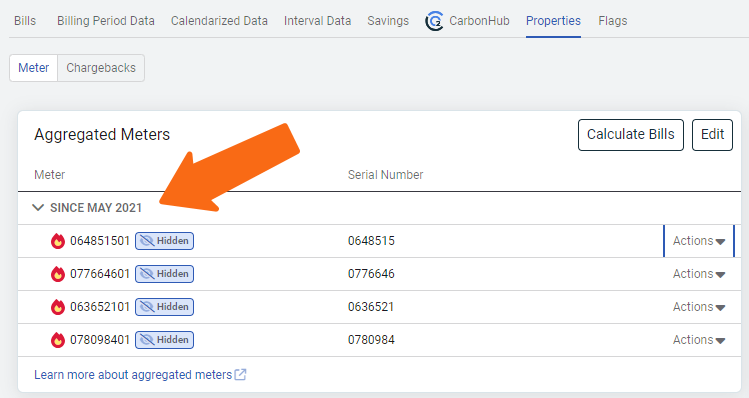
When the aggregation is successful, the selected meters appear nested under the new aggregate meter.
If you encounter an error when creating an aggregate meter, check the specific aggregate rules for your state.
Update an aggregate meter
You can update your aggregate meter at any time by adding or deleting meters. For example if you added on to your building or added a tenant to a previously vacant space you may need to add a meter.
- When you edit the aggregate meter you can edit the original version or create a new date effective version.
- If you edit the original version the edits take effect for the next billing period, bills are not recalculated.
- You can recalculate bills for an aggregate meter by using Calculate Bills and then select the month and year to calculate.
Add a meter
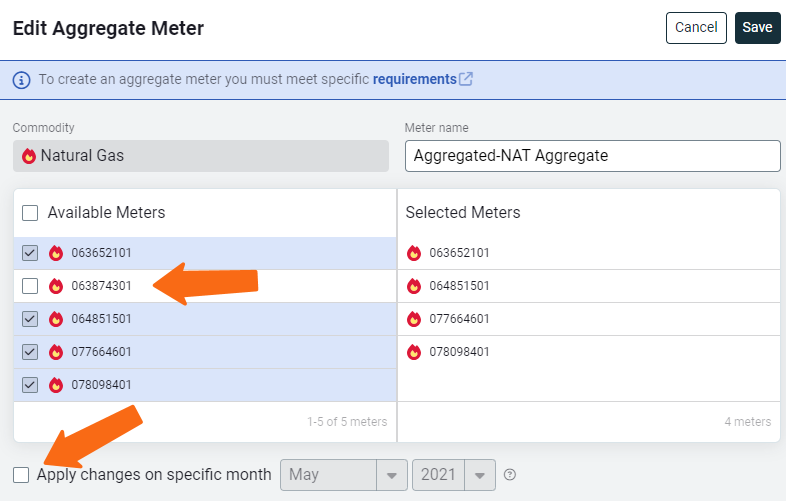
- On the building's Properties tab, click the Actions menu for the aggregate meter and choose Edit.
- Click the meter's you want to add.
- Decide if you want to apply this change to the original version or click Apply changes on a specific month and select the month and year you want the changes to start. This creates a new version of the aggregate meter.
Remove a meter
When you remove a meter from an aggregate meter the individual meter and all its bills are removed from your database. You will need to re-import the meter and request a data release.
- Click the aggregate meter in your tree.
- Use the Actions menu for the meter you want to remove.
- Click Remove meter from aggregate...
- Review the warning message and click Remove.

Manually calculate aggregate bills
Aggregate bills are created automatically by EnergyCAP when billing data is available and are based on calendarized billing data. Calendarized data requires billing data for every day in the month, for example when a bill ends on May 15, you must wait for May 15 - June 15 bill for the calendar month of May to be complete.
If you were expecting an aggregate bill but it isn't created, you can try to manually create one and review the error file. The most common scenario is when a meter stops providing bills because a tenant moved out. In this case you can edit and update the aggregate meter version.
If you edit an aggregate meter and add or remove a meter that should have been part of the original configuration, you must manually create bills for all the previous affected months.

Request data access
A data release form is required when you, depending on your state, do not have enough tenants in your building for them to be aggregated.
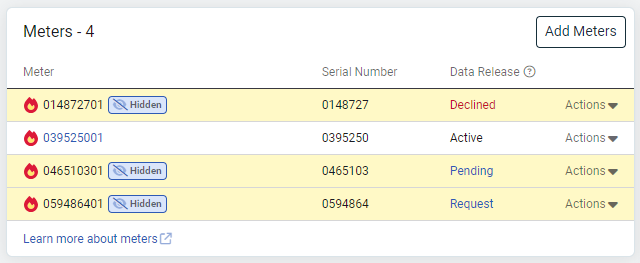
Meters remains hidden and no data is available until the release form is complete.
Data release statuses
- Not required—you are the account holder for the meter or the meter is part of an aggregate
- Active—a data release form is approved and uploaded.
- Request—the building owner can send and request approval for the data release.
- Pending—waiting for a response from the tenant. You can send multiple requests only the most recent request contains a valid link.
Request access electronically
Steps to request a data release by email.
- On the Building's Properties tab, click the Request link for the meter.
- Click Send Request by Email.
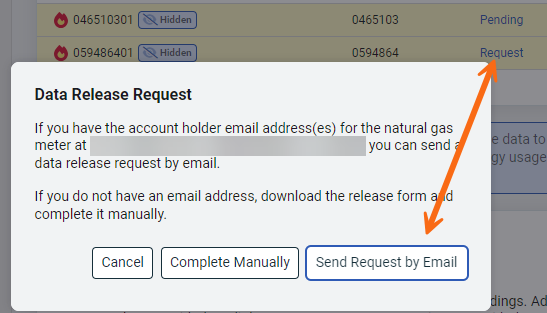
- Complete the Send Data Release Request.
Optionally add a personal note to the email so your tenants know this is a legitimate request and not spam.
- The meter status is changed to Pending until the tenant completes the data release.
Request access manually
If your tenant is unable to receive the data release by email, or is not responding to the request, you can download a paper form and ask your tenant to complete it manually.
- On the Building's Properties tab, click the Request link for the meter.
- Click Complete Manually.
- Download the form. You can come back to this step at any time.
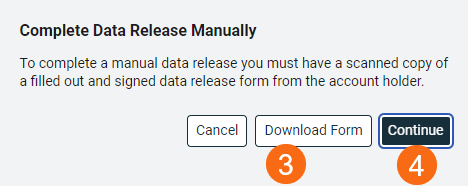
- Scan or take a picture of the completed form. Return to this step and click Continue.
- Upload the completed data release and complete the form.
- Click Submit.
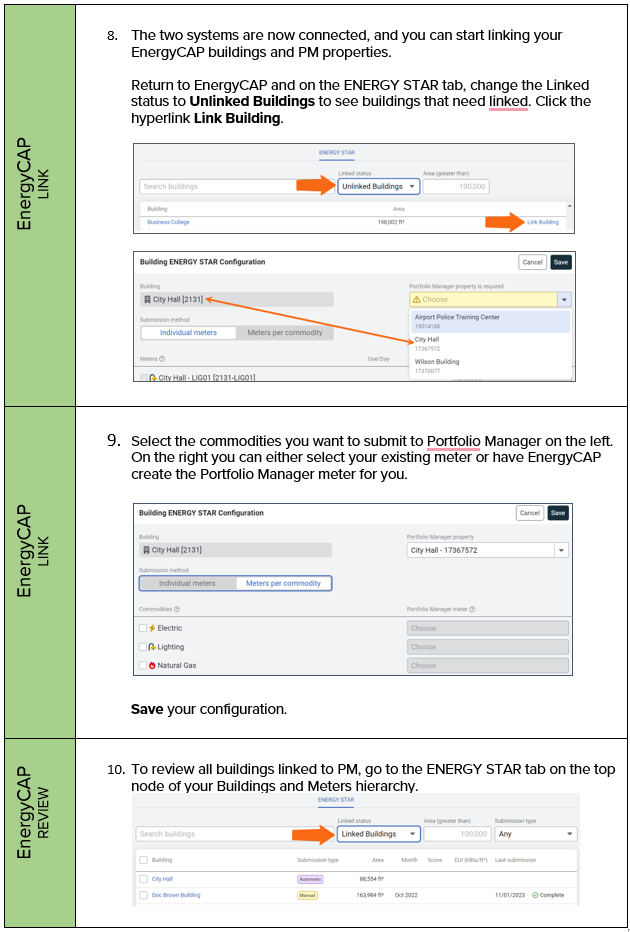
Configure ENERGY STAR Portfolio Manager account to submit data with Utility Company Platform