Manage user groups
Last updated October 7, 2026
User groups are named collections of EnergyCAP users that make it easy to share content and send notifications to the same set of people repeatedly. Instead of selecting individual users each time you share a report or dashboard, you select the group.
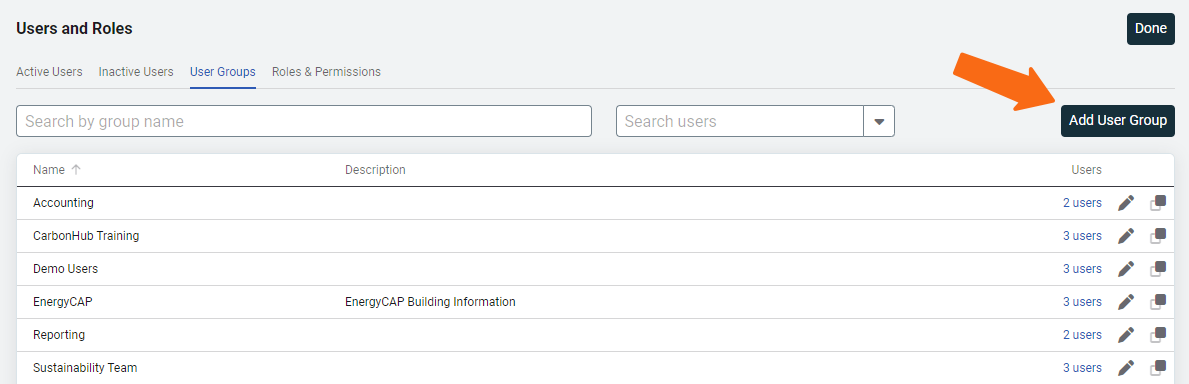
User groups are managed in Settings > Users and Roles > User Groups.
What user groups are used for
- Share reports, dashboards, bill lists, or collections.
- Send notifications.
- Distribute reports.
Steps to add a new user group
- Go to the Settings menu (Gear icon).
- Select Users and Roles.
- Click the User Groups tab.
- Click Add User Group.
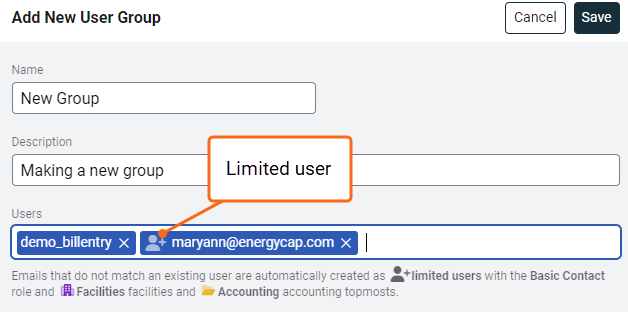
- Enter a name and description.
- Add users to the group by selecting their email address. A user must have an email address to be included in a group.
- You can add users that don't exist in EnergyCAP by entering their email address. This new user is created with the Basic Contact role.
In this dialog, any limited user has a different icon in front of their email address.

- Click Save. A success banner is shown.
Steps to edit a user group
- Go to the Settings menu (Gear icon).
- Select Users and Roles.
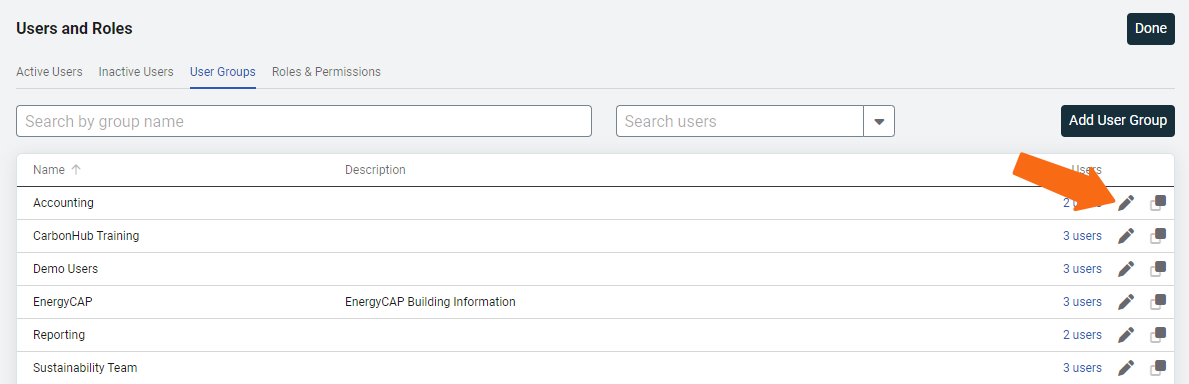
- On the User Groups tab, click the pencil for the group you want to edit.
Create a user group with a spreadsheet
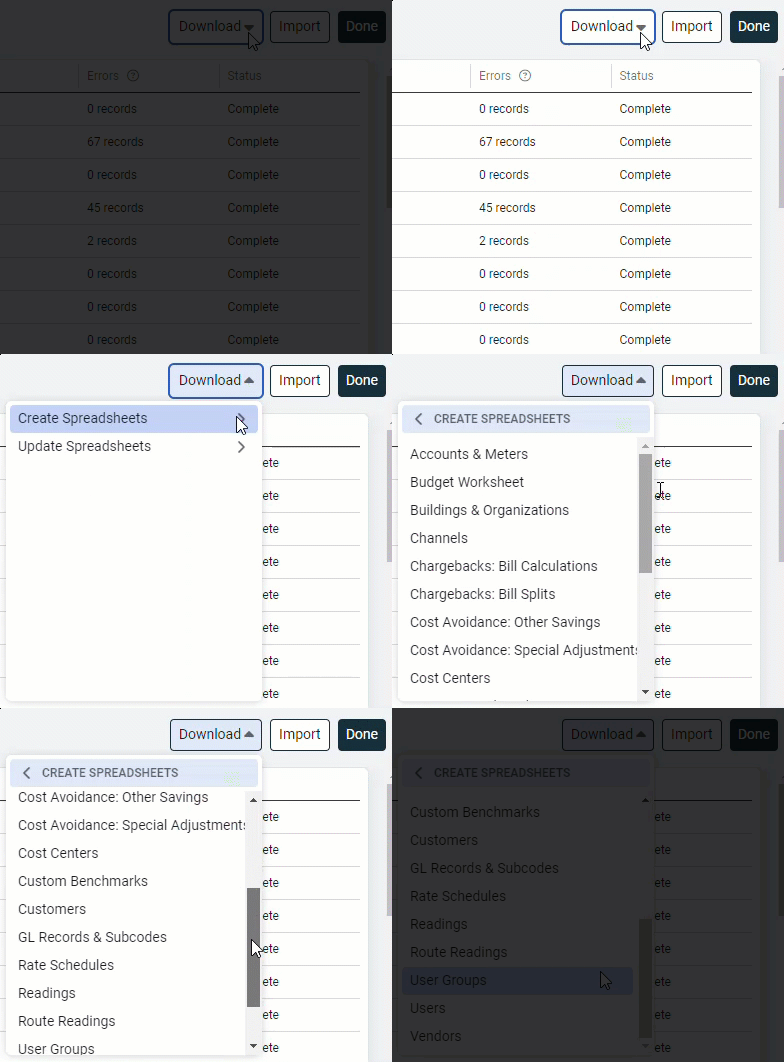
- In the Create dialog, click Setup Spreadsheets.
- From the Setup Spreadsheets Log, click Download and choose the create User Groups spreadsheet.
- If you don't have any groups, you will not see any rows listed in your spreadsheet.
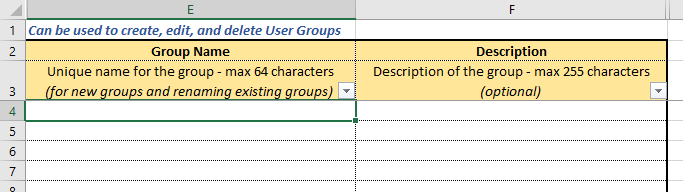
- Add your group names, save the spreadsheet, and upload it to EnergyCAP.
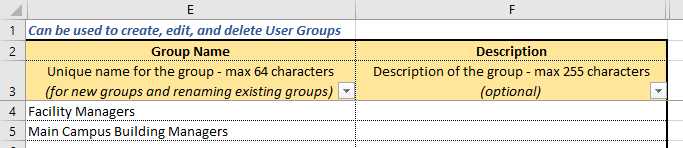
Add users to the group with an update spreadsheet
- Download the update User Group Members spreadsheet and assign users to each group.

- Select either a Full Name in column C or a Username in column D.
![Update User Group Members spreadsheet with the groups Facility Managers and Main Campus Building Managers and empty Full Name [Username] and Username columns.](../assets/images/Users/manage3.png)
To quickly add a large group of people, copy and paste the usernames into column D from an Update Users spreadsheet. Add as many rows as needed.
![Update User Group Members spreadsheet with user names entered in the Full Name [Username] column and usernames entered in the Username column for Facility Managers and Main Campus Building Managers.](../assets/images/Users/manage4.png)
- Save the spreadsheet and upload it to EnergyCAP.
Regardless of the number of users added or removed, the Setup Spreadsheets Log indicates the number of groups updated. In this example, three groups were updated.

Filters help you manage user group members
To manage a specific user's group membership, apply filters before downloading the Update User Group Members spreadsheet. For example, if you filter by the user "amr", the spreadsheet includes all groups that include that user.
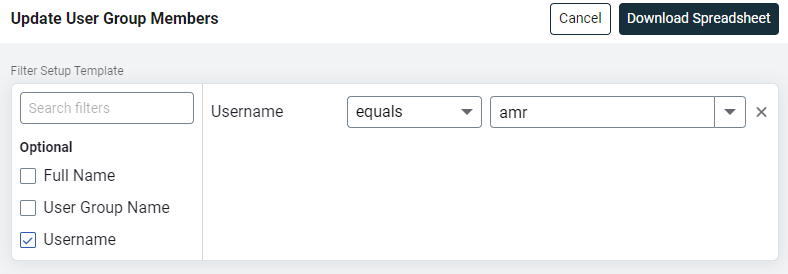
The spreadsheet lists each group the member belongs to. All group members are listed in addition to the selected member.
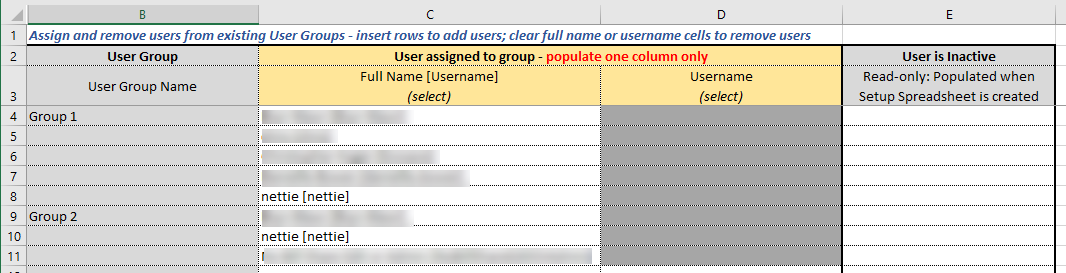
Manage groups with an update spreadsheet
Manage group names and descriptions or delete a group with an update User Groups spreadsheet.
- From the Setup Spreadsheets Log, download the update User Groups spreadsheet.
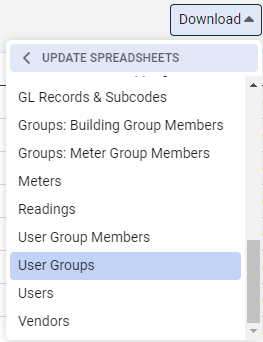
- Update the group name and description. Select Delete User Group to delete the group.

- Save the file and upload it to EnergyCAP.