Create accounts and meters with a spreadsheet
Last updated June 24, 2026
Setup Spreadsheets Overview
Setup spreadsheets help you save time by creating multiple items at once.
- Always download a new spreadsheet before adding data—it’s populated with information from your database.
- To save time, select a value from the drop-down and copy it into other rows as needed.
- To update actual utility bill use and cost, use the Bill Import File from the Bills module.
Formatting Rules
- Enter all information as text or dates.
- Only the sheet named DataEntry is processed—you can add other sheets, but they are ignored.
- Do not rename, delete, or rearrange columns.
- If you copy and paste information, you must use the paste as values option.
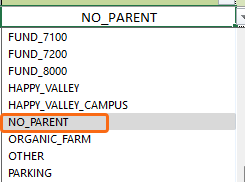
If you are unsure where to place a meter or account, use the NO_PARENT option from the drop-down. After you import the accounts and meters you can move them.
Download the create spreadsheet
In the Create dialog, click Setup Spreadsheets.
- From the Setup Spreadsheets Log, click Download.
- Under Create Spreadsheet, choose Accounts and Meters.
- Download the spreadsheet.
- The file name format is
yyyymmdd-CREATE_AccountsAndMeters.xlsx. - Add your information and save.
- Use Import to upload your spreadsheet.
- The Setup Spreadsheets Log reports the results and any errors. You can download the error (kickout) spreadsheet from the hyperlink, fix any errors, and upload the error sheet.
This spreadsheet creates two different objects:
- Accounts in columns B through O.
- Meters in columns O through AM.
- Column O is populated for every row.
Permissions
The ability to create objects is determined by user role and any limits placed on the user's topmost place or topmost cost center.
Maximum length for codes and names
The column header lists the maximum length for each attribute. When entering data, a red cell indicates the name or code exceeding the specified length. If you upload the spreadsheet without fixing the cell, the row fails to process and an error spreadsheet is created.
Deregulated meters and the create spreadsheet
The create spreadsheet links the account and meter as they are created.
To link a second account to an existing meter, create the new account as normal and enter the vendor role and existing meter code, commodity, account number, and rate schedule, then leave the remaining columns blank.
Create accounts and meters spreadsheet details
|
Column |
Rules |
|
Account Number |
Enter a unique account number for each vendor. The row fails to process when a duplicate is found. |
|
Account Name |
The name does not need to be unique but keeping names unique makes searching and reporting much clearer. If you are unsure, use the service address + commodity + increment as the name, rather than the account number as the name; this also reduces confusion later if the vendor updates the account number. Example: 123 Main Street - ELE01 |
|
Service Address: Street 1 |
|
|
Service Address: Street 2 |
|
| Service Address: Street 3 | |
| Service Address: City | |
| Service Address: State/Province/Region | |
|
Service Address: Postal Code |
Postal code is required when the country is United States or Canada. Code format is xxxxx-xxxx (xxxxx is accepted) for United States OR xxx xxx for Canada. Use numbers and dashes as needed. Enter as text. |
|
Service Address: Country |
If blank, this field defaults to the United States. |
|
Cost Center [code] |
Choose the parent cost center from the drop-down. The cost center must be created before you download the spreadsheet or it isn't shown as an option in the list.
*To save time when creating multiple objects, after you select an entry from a drop-down you can copy and paste it into the row below. |
| Include Account in Bill Accruals | The default is yes. |
| Account Description | Enter a description or notes for this account. |
| Bill Capture method | Select the Bill Capture method that is used for the account from the drop-down. |
| Landlord Account | Select yes from the drop-down if this is a landlord account. |
|
Vendor [code] |
Choose from the drop-down. This is required for both the account AND meter. The vendor must be created before you download the spreadsheet or it isn't shown as an option in the list. |
Characters allowed in account numbers and meter codes
|
*The first 6 are allowed in all codes, the last 3 can also be used for account and meter codes.
Prerequisites
Before creating a meter the following must exist.
- Vendor
- Rate schedule
- Account for the meter
- Parent place (Typically this is a site, if the parent place is unknown, try creating and using a temporary organization like NO_PARENT) Review the meter help topic for the disadvantages to placing a meter under an organization.
|
Columns |
Rules |
| Remit To | Enter the name to be used for check payments. This can be the same name as the vendor name. |
| Remit Address Street 1 | |
| Remit Address Street 2 | |
| Remit Address Street 3 |
If this field has an input, it is concatenated with Street Address Line 2 when sent to Bill Pay. |
| Remit Address City | |
| Remit Address State/Province/Region | Select from the drop-down. |
| Remit Address Country | Select the country from the drop-down. If blank the default is United States. |
| Remit Address Postal Code | Enter your postal code. US ZIP+4 is optional. |
|
Vendor Role for this Account/Meter Combination |
Choose from the drop-down. |
|
Commodity |
Choose from the drop-down. |
|
Time Zone of Meter |
If blank defaults to the time zone set in System Settings. |
|
Serial Number |
The physical hardware identifier. This may change when the meter is replaced. |
|
Meter Import ID |
Typically used to import submeter readings. |
|
Meter Code |
Meter code is a unique identifier and typically does not change. This code must be unique, the row fails to process when a duplicate is found in your database. The best practice is to use BuildingCode-Commodity-Increment, for example, BLDG123-ELE01. This numbering system lets you add multiple electric meters to one building. BLDG123-ELE02 BLDG123-ELE03 |
|
Meter Name |
The name does not need to be unique but keeping names unique makes searching and reporting much clearer. Building 123 - ELE02 Building 123 - ELE03 |
|
Parent Building [code] |
This is the building where the meter is attached. It is recommended to attach meters to buildings. If you aren't sure where to attach your building you can select NO_PARENT.
Because organizations don't have floor area as an attribute, a meter attached to an organization may negatively affect reporting. Meters attached to organizations aren't included in budget worksheets. |
|
Primary Use for Meter |
Meter primary function is used for reports and benchmarks. Automatic system groups are created for each primary use; these groups can be used as filters. |
|
Account Number |
Required, enter the account number for this meter. |
|
Rate Schedule |
The rate used by the vendor to calculate meter costs. This is often found on the bill. You only see the rates available for the vendor/commodity you selected. |
|
Use Unit |
Enter the use unit from your utility bill. The use unit is used in charting and calculations. |
| Demand Unit | Enter the demand unit from your utility bill. The demand unit is used in charting and calculations. |
|
Meter Address: Source of Address |
You can use the address of the account, the building, or provide an address. |
| Meter Address: Street 1 | Enter meter address if it differs from the account or building address. |
|
Meter Address: Street 2 |
|
| Meter Address: Street 3 | |
| Meter Address: City | |
| Meter Address: State/Province/Region | |
| Meter Address: Postal Code | |
| Meter Address: Country | |
| Latitude | For future use when mapping meters. |
| Longitude | For future use when mapping meters. |
| Meter Description | Enter an optional description for the meter. |