Setup spreadsheets overview
Last updated July 6, 2026
Setup spreadsheets are Excel-based templates you download from EnergyCAP, fill in with your data, and upload to create or update records in bulk. They are the fastest way to make large-scale changes—such as adding sites, meters, accounts, or vendors—without entering each item one at a time in the application.
There are two types: Create spreadsheets for adding new records, and Update spreadsheets for modifying existing ones. Always download a fresh copy before filling it in, as the template is pre-populated with data from your database.
Setup Spreadsheets Overview
Setup spreadsheets help you save time by creating multiple items at once.
- Always download a new spreadsheet before adding data—it’s populated with information from your database.
- To save time, select a value from the drop-down and copy it into other rows as needed.
- To update actual utility bill use and cost, use the Bill Import File from the Bills module.
Formatting Rules
- Enter all information as text or dates.
- Only the sheet named DataEntry is processed—you can add other sheets, but they are ignored.
- Do not rename, delete, or rearrange columns.
- If you copy and paste information, you must use the paste as values option.
Setup Spreadsheet Log
The Setup Spreadsheet Log lets you review all the spreadsheet files you've uploaded for setup tasks.
How to access it
- Open the Create dialog or
- Go to the Settings menu (Gear icon) and select Setup Spreadsheet Log
What it tracks
- A log of all uploaded files and their processing results.
- You can only view your own uploads.
- Users with the Administrator: Full Access role can view all users' logs.
Processing behavior
- While processing, if 100 consecutive empty rows are encountered, processing stops, and the file is closed.
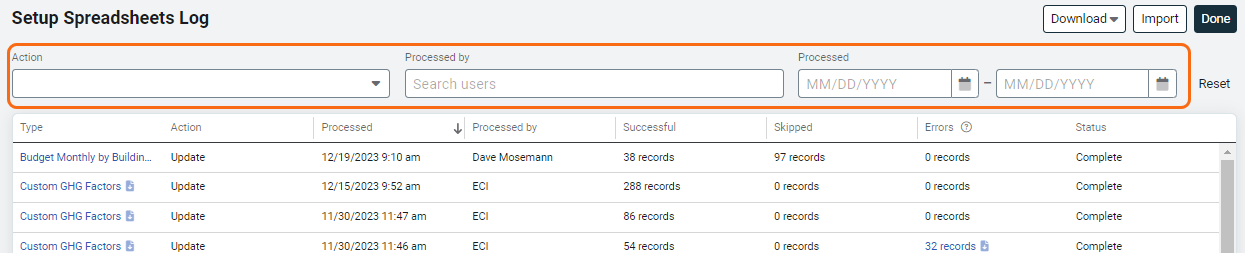
Filter the spreadsheet log
You can filter the Setup Spreadsheet Log to quickly find file uploads and results.
Upload order when using spreadsheets
Upload spreadsheets in the following order when creating objects.
For example, when you want to create a meter, search to find the vendor, rate schedule, and building you want to use with the meter. If these items already exist, create the account and meter. If not, you need to create the vendor, rate schedule, and building (in that order) and then the account and meter.
The creation order is:
- Vendors
- Rate schedules
- Sites and Organizations
- Cost Centers
- Accounts and Meters
Create spreadsheets are available for
- Accounts and Meters
- Budget
- Sites and Organizations
- Channels
- Chargebacks: Bill Calculations
- Chargebacks: Bill Splits
- Cost Avoidance: Other Savings
- Cost Avoidance: Special Adjustments
- Cost Centers
- Custom Benchmarks
- Customers
- GL Records and Subcodes
- Rate Schedules
- Readings
- Route Readings
- User Groups
- Users
- Vendors
Update spreadsheets are available for
- Accounting Calendar
- Accounts
- Sites and Organizations
- Channels
- Chargebacks: Bill Calculations
- Chargebacks: Bill Splits
- Cost Avoidance: Other Savings
- Cost Avoidance: Special Adjustments
- Cost Centers
- Custom Benchmarks
- Custom Fields: Accounts
- Custom Fields: Sites
- Custom Fields: Meters
- Custom Fields: Vendors
- Customers
- ENERGY STAR: Mappings
- GL Records and Subcodes
- Groups: Building Group Members
- Groups: Meter Group Members
- Meters
- Readings
- User Group Members
- User Groups
- Users
- Vendors